Thursday, April 28, 2011

Mother's Day and my beautiful baby...

For those of you stumped for inspiration for a personal Mother's Day Gift, I have an idea for you!

..........

I recently had to give my mom a gift, and she is one of those people who are incredibly hard to buy for.  So, I decided to go the DIY route and come up with something that had that personal and handcrafted style to it.

It all started with this photograph...


It is a side profile of one of my sweeties taken on a plain background.  

I then used Photo Shop to create a silhouette of her.  

For you Photo Shop fans, I used the Magic Extractor to separate my baby from the background.  I then layered a dark scrapbook paper over her profile and used a clipping mask to make the dark shadow effect for her face.  Then, I added a patterned scrapbook paper for the background.

It ended up like this after I printed it on photo paper...


I then framed the silhouette in a chunky fabulous frame that looked just like my mom and coordinated with the coloring of my files.


The final product was this... 


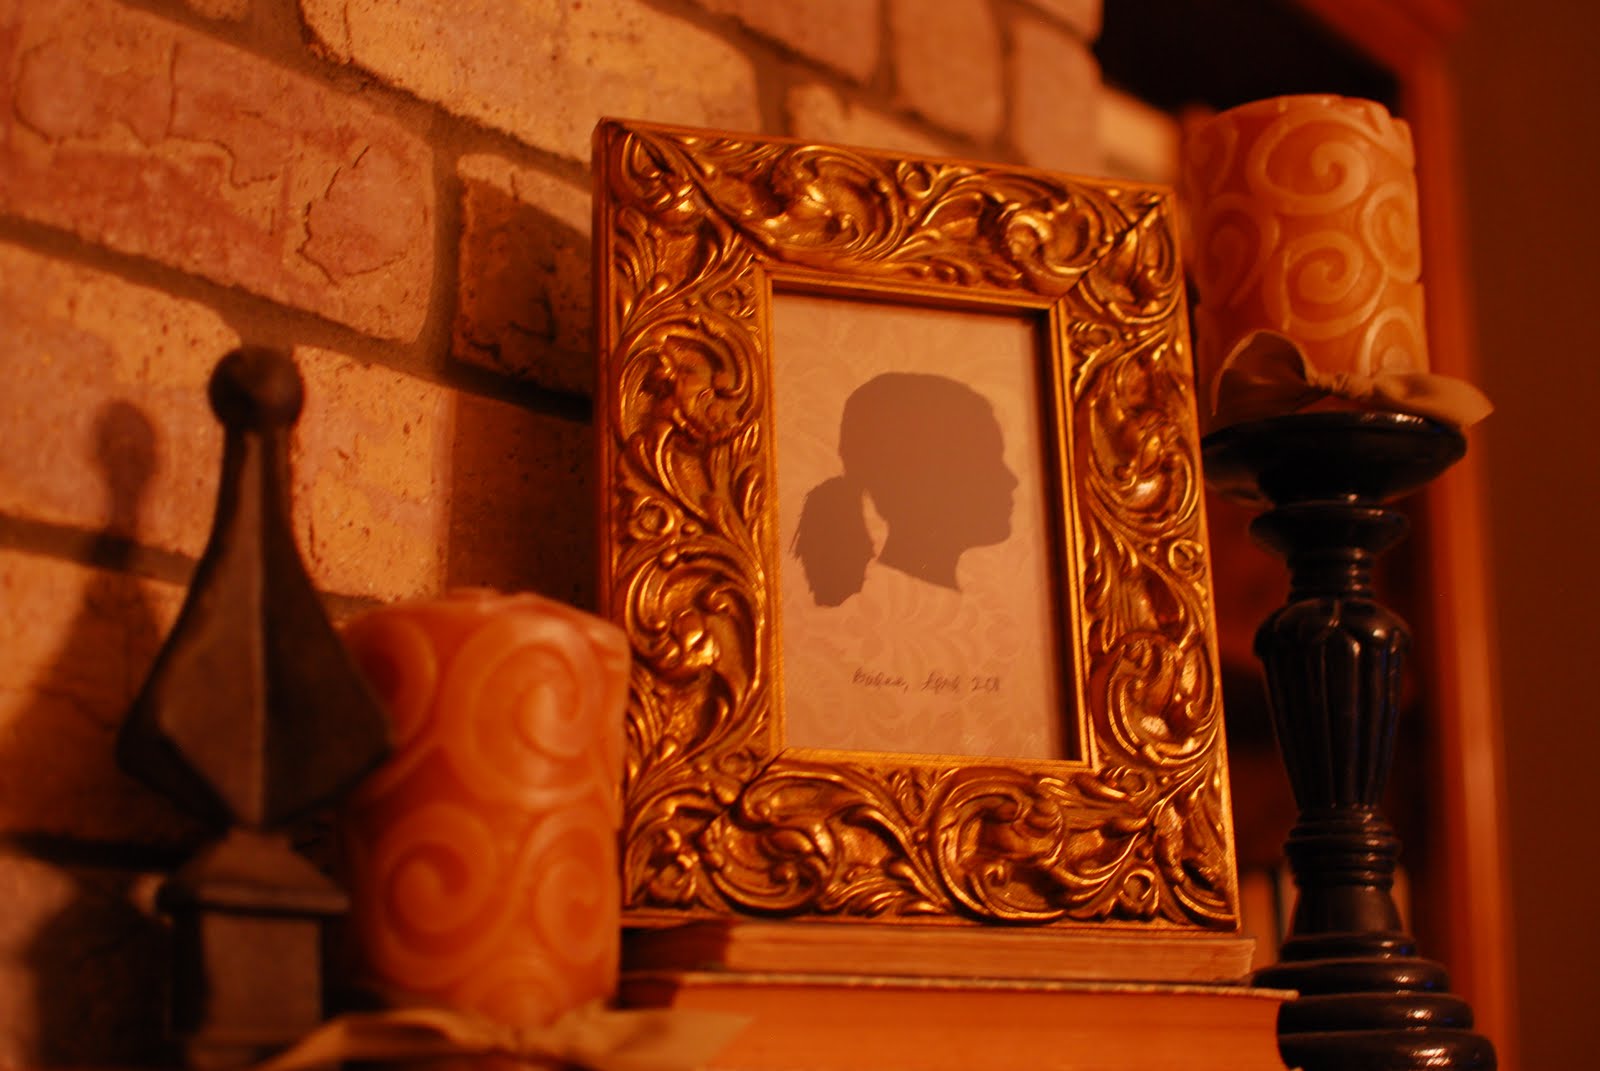
It was just one of a set of two.  They looked great as a pair, and I have to tell you my mom was THRILLED!  

..........

For those of you who do not do Photo Shop, you can also do this manually by tracing the profile on dark paper, cutting it out, and attaching it to a background scrapbook paper that you prefer.  I am just a digi kinda girl so I went that route.  

..........

Enjoy, and I hope your mothers enjoy too!


Monday, April 25, 2011

Death of the popcorn ceiling...

I have decided to call our new house the "project" house.  That way every time somone points out something we need to change, I can just say it's a project.

Funky arch windows?  No problem, it's a project.
Ugly yellow siding? We can fix that... It's just a project
No grass in the yard?  Yet another project.

I could keep going, but it is depressing me.  Sigh... This list is really long!

..........

However, one thing I could not excuse for later was the popcorn ceilings.  GAG!

If you have ever considered scraping popcorn ceilings, I am here to tell you: GO FOR IT!  This house had dirty, nasty, stained, ugly, outdated, foul ceilings.  I could not stand it.

To scrape these off, you just have to get them wet (we used a garden pump spray bottle) and then scrape them with a long handle scraper. 


This shows the difference in before and after in the living room.  You can't really tell from pictures, but the room looked literally 2 feet taller in the areas where it had been scraped.  It was a beautiful thing!

..........


However, be prepared for a few things:

Number 1:
Your arms will feel like they are going to fall off.  I scraped one small room and then backed away and left it to the professionals.  They were way more buff than I and made it look easy!

Number 2: 
Scraped. Texture. Will. Go. EVERYWHERE.

(by the way, who put their cracker right there?  What kind of mother am I that my kids were stashing their snacks in the midst of 30 year old texture?  That is gross layered right on top of nasty!)

NUMBER 3:

You might not ever eat oatmeal again.


Maybe it won't bother you, but to me this looked like a big pile of really dirty oatmeal.  I was not a huge fan of it before, but now I might not be able to touch the stuff.

NUMBER 4:

Your kids will not be able to stand staying out of the stuff.  Mine were drawn to it like a magnet, so I gave them a broom and let them go to town.  And... they had a little friend to help - many hands make light work!


.........

Pictures of the newly textured and painted ceiling are coming soon.  Trust me, it was so worth the effort and the time. 

Rest In Peace popcorn ceilings...


Wednesday, April 20, 2011

Either crazy or genius...

My family has either made a crazy decision, or the most genius decision ever...  We are moving. Again...


I had planned on taking pictures before anything was changed but while I was at work one day, the hubby started putting his boot through walls.  Men... Do they ever outgrow their juevenile tendancies?!?  Gotta love them, though!

..........

So, when we get done, this house will look nothing like what it did when we started.  If you wanna know what we are working with, here is the grand tour:

THE KITCHEN:


I love, love, love the cabinetry.  At the risk of sounding old, I am just going to throw it out there - they just don't make cabinets like they did in 1975.  I would not rip these out to save my life.

However, 1975 called (on the 1980's phone) and said they want their countertops back. 


THE ENTRY:


 There. Are. No. Words.


THE LAUNDRY ROOM:


 Can you hear my squeals of delight over this walk-in laundry room through the computer?

  
THE BATHROOMS:


One Red Wing through it and this tile all cratered... Mark's evil grin made me think he enjoyed it.  

THE LIVING ROOM


Yet again, I was late with my pictures.  Where there is bare walls and floor, there once was wood paneling and carpet.  And, why yes, you're right... that is a skylight.

THE SUNROOM


So excited for all the plants that are going to be happy in this room.
...........

We have so much work to do, but it is fun work... So, what's the verdict - crazy or genius?!?


Sunday, April 17, 2011

A Play Kitchen For My Darlings...

I have a theory in life... If you can't find it or afford it, you should make it.  

..........
This theory definitely came in handy lately when we decided one of my angels "needed" a play kitchen.  She is constantly serving everyone cakes and tea and other creations she has made.  So sweet it almost makes a sappy mama like me cry!

So, we began searching and scouring stores and the internet, but could never find what we wanted.  I am a self-proclaimed snot about some things, and particle board is one of the things that I refuse to spend my money on.  So we narrowed our search to this one... It is at Pottery Barn and cost an unsightly $879.  


I could barely pick my chin up off the floor!  They say you can't put a price on love, but I would dare say that most parents are like me and would draw the line around spending $900 on a toy their princess will outgrow in a few years. I decided I am just too cheap for this toy...

Instead, I found plans for a homemade version on the Lowe's website that would work out just as well.  The plans said *advanced* level... Cue the sound of me calling in my dad for reinforcement!  We ended up with this:


We built the ENTIRE thing out of scrap wood that was just laying around.  Then added some real details that stepped up the style for my babies!


 The knobs are authentic and came from a second-hand appliance store, and the burners are a combination of mortar saw blades (not sharp, I promise!) and furniture slides.


 The sink (a boat sink from a local surplus store) and the faucet (donated by the greatest papa in the world) are perfectly sized for tons of imagination and play!


The refrigerator shelves were cut from a wire shelf bought at a local home improvement store.

DRUM ROLL FOR THE GRAND TOTAL, PLEASE...
$87.49...
 
 ..........

And lest you think that their kitchen always looks this perfect... Here is a picture of it just 15 minutes after I staged it for pictures! 


Love those girls of mine...